The Fiery Artistry: Pyrography on a Hickory Bowl
Did you know that handcrafted wooden bowls, especially those featuring intricate pyrography, can command prices ranging from hundreds to even thousands of dollars depending on the artist’s skill and the complexity of the design? This isn’t just about a functional object; it’s about a piece of art born from fire and skill, a testament to patience and a steady hand. The process of creating a pyrographic design on a hickory bowl, from initial sketch to the final seal, is a journey that transforms humble wood into a treasured heirloom. It demands a specific set of tools, a deep understanding of the medium, and an artistic vision that can translate ideas into burn marks on a curved surface. Many hobbyists dip their toes in, but few truly master the delicate dance of heat and wood that defines professional pyrography.
What Exactly is Pyrography?
Pyrography, literally meaning „fire writing,“ is an art form that involves burning designs onto a surface – typically wood, leather, or even gourds – using a heated tool. Unlike painting or carving, the effect is achieved through controlled scorching, creating shades and textures by varying the heat and pressure applied. A common misconception is that it’s simply ‚drawing with fire,‘ but it’s far more nuanced, involving a deep understanding of how different wood types react to heat. For example, denser hardwoods like hickory tend to accept burns more consistently than softer woods, allowing for finer detail and smoother gradients in shading, a key reason why it’s often chosen for this technique.
The Appeal of Hickory Wood for Burning
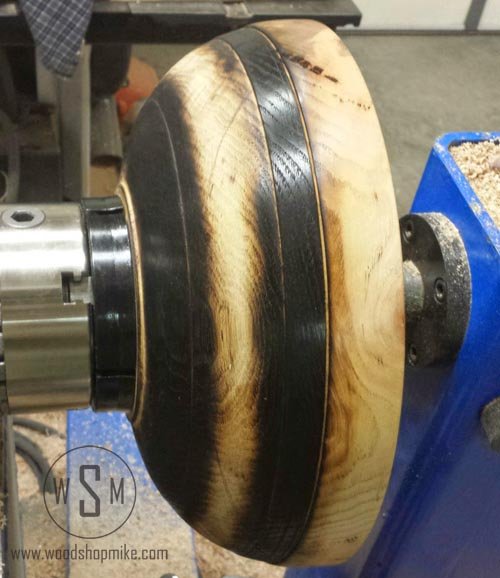
Hickory wood presents a unique canvas for pyrography, offering a delightful combination of hardness, fine grain, and a pleasing light brown hue. Its density means that burn marks are crisp and defined, preventing the fuzzy edges that can plague softer woods. This characteristic is invaluable when an artist needs to render incredibly fine lines or subtle shading. A bowl crafted from hickory, therefore, provides a durable and visually appealing base for intricate pyrographic designs. I’ve seen firsthand how a well-executed design on hickory can showcase a depth of contrast that simply isn’t achievable on, say, pine. The wood itself contributes to the aesthetic, its natural warmth complementing the fiery art applied to its surface.
The Tools of the Trade: What You’ll Need
To embark on pyrography, a specialized tool is essential: a pyrography pen, also known as a wood-burning tool. These pens come with a variety of interchangeable tips, each designed for different effects, from fine-line drawing to shading and stippling. Think of them as specialized paintbrushes, but instead of applying pigment, they apply controlled heat. Beyond the pen itself, you’ll need sandpaper of various grits for preparing the wood surface and finishing the piece, a sketch or stencil for your design, and often a sealant like beeswax or a food-safe finish if the bowl is intended for serving. A colleague once showed me his setup, which included a dedicated ventilation fan to whisk away the smoke – a crucial safety and comfort consideration that’s often overlooked by beginners.
The Process: Bringing a Hickory Bowl to Life
The creation begins with selecting a smooth, sanded hickory bowl. Next, the chosen design is transferred onto the wood, often using transfer paper or by freehand drawing. Then comes the heart of the process: applying heat. The artist selects an appropriate tip for their pyrography tool, heats it to the desired temperature, and begins to burn the design. This isn’t a hurried affair. It involves careful, deliberate strokes, building up shades and lines gradually. Some sections might require multiple passes at different heat levels to achieve the intended depth. A key challenge is maintaining consistent pressure and temperature, especially on a curved surface like a bowl’s exterior. Even slight variations can lead to noticeable differences in the burn. When I experimented with this, I found that the curve of the bowl meant I had to adjust the angle of my hand constantly; it’s a physical challenge as much as an artistic one.
Achieving Depth and Detail: Shading and Texture
Pyrography isn’t just about black lines; it’s about creating a full spectrum of tones and textures. Skilled artists use different tips and techniques to achieve this. A ball-shaped tip, for instance, can be used for stippling, creating areas of soft shading by making countless tiny dots. A flat-edged tip might be employed for smooth, blended gradients. The artist must understand how to vary pressure and the duration the hot tip rests on the wood to control the darkness and intensity of the burn. This nuanced control allows for incredibly realistic textures, from the soft fuzz of a peach to the rough bark of a tree. I recall seeing a piece where the artist had managed to replicate the iridescent shimmer of a butterfly’s wing through masterful shading – pure magic with a hot wire.
Mistakes Happen: Correcting and Adapting
Mistakes are an inherent part of any craft, and pyrography is no exception. A slip of the hand can result in an unintended dark mark, or a burn might be too light. Fortunately, there are ways to address these imperfections. Minor errors can sometimes be gently sanded away, though this risks removing too much wood or altering the surrounding burned areas. A more common approach is to creatively incorporate the ‚mistake‘ into the design, turning an accidental scorch into a shadow or an interesting texture. This adaptability is a hallmark of experienced artists. Wait, that’s not quite right – sometimes the best ‚correction‘ is simply to embrace it as part of the unique character of the piece, making it truly one-of-a-kind. It’s a philosophy that applies beyond the workshop.
Sealing and Finishing: Protecting the Art
Once the burning is complete and the bowl has cooled, the final step is to seal and finish the piece. The choice of finish depends largely on the intended use of the bowl. If it’s purely decorative, a clear varnish or lacquer can be applied to protect the wood and the pyrographic design from dust and UV damage. However, if the bowl is meant to hold food, a food-safe finish is absolutely critical. Natural oils like mineral oil, beeswax, or specialized food-grade sealants are excellent choices. These finishes not only protect the wood but also enhance its natural beauty, bringing out the rich colors and contrast of the burned areas. Applying a beeswax finish is my personal favorite; it gives the hickory a lovely subtle sheen and a wonderfully smooth feel.
The Long-Term Value of Hand-Burned Art
The value of a pyrography-decorated hickory bowl extends far beyond its material cost. It represents hours of dedicated craftsmanship, artistic skill, and the creation of something genuinely unique. Unlike mass-produced items, each hand-burned bowl carries the subtle imperfections and the personal touch of the artisan, making it a one-of-a-kind treasure. These pieces often become cherished family heirlooms, passed down through generations, their value increasing with time and sentiment. A well-crafted piece, like the ones I’ve seen displayed in local galleries, tells a story – a story of fire, wood, and human creativity that machine replication can never replicate.
Ultimately, a hickory bowl with pyrography in progress is more than just a project; it’s a conversation between artist and material, a dance of heat and wood that results in enduring beauty. The journey from a simple wooden form to a fire-etched masterpiece is a slow, deliberate process, but the result is an object imbued with character and soul, a tangible piece of artistry that will captivate for years to come. These aren’t just bowls; they are canvases transformed by passion, proving that the most captivating art often arises from the simplest elements combined with exceptional skill.