DIY Repair for Your Oneway Live Center: Getting Back to Smooth Turning
Did you know a worn-out live center can cause vibrations so severe they shake your entire workbench? It sounds dramatic, but I’ve seen it happen. A wobbling live center isn’t just annoying; it’s a safety hazard and a sure way to ruin a perfectly good piece of wood. Many woodturners, especially those starting out, toss a faulty live center and buy a new one, thinking repair is too complex or impossible. This often adds up to hundreds of dollars over time. But what if I told you a surprising number of these critical tools can be revitalized with just a few common shop items and some elbow grease?
Understanding Your Oneway Live Center: What’s Going On?
A live center is the workhorse at the tailstock end of your lathe, spinning with your workpiece. Its primary job is to support the end of the wood, allowing it to turn freely without wobbling. The core component is a bearing system, typically sealed, allowing the pointed shaft to rotate independently of the stationary body that mounts to your tailstock. When you notice increased friction, erratic spinning, or a distinct wobble when you try to spin it by hand, it’s usually a sign the internal bearings are compromised. Grit ingress, lubricant breakdown, or simple wear and tear are the usual culprits. This isn’t the end of the line for your tool; it’s often just a signal for some basic maintenance.
Why Bother Fixing It? The Cost-Benefit Analysis
The most compelling reason to repair your own Oneway live center is, unequivocally, cost savings. A new, high-quality live center from Oneway can easily set you back $75 to $150 or more, depending on the model. If you’re a hobbyist turning occasionally, this might not sting too much. But for someone who turns frequently, or if you’ve experienced the frustration of multiple failures over a few years, the cumulative cost becomes significant. For instance, I remember a colleague who went through three mid-range live centers in five years, spending over $300. He then learned to service his own, saving him that recurring expense and allowing him to invest in better quality tools for his lathe instead.
When is a DIY Repair Actually Feasible?
Not every live center failure warrants a DIY fix. If the main body is visibly cracked or severely damaged, or if the shaft itself is bent, it’s likely time to consider replacement. However, for the vast majority of issues — increased friction, roughness when spun by hand, or a slight wobble that isn’t catastrophic — a repair is not only feasible but often straightforward. My own experience with a beloved Oneway model showed a noticeable grittiness after a particularly dusty sanding session. I thought it was a goner. But after a careful disassembly, cleaning, and re-greasing, it spun smoother than when I first bought it. This type of restoration is incredibly common and achievable.
Common Signs of a Failing Live Center
The indicators of a live center needing attention are usually quite apparent. A primary symptom is resistance when you try to spin the point by hand; it should feel smooth and almost frictionless. Any roughness, catching, or grinding points directly to bearing issues. Another tell-tale sign is audible noise during operation – a distinct squealing or grinding sound coming from the tailstock area while the lathe is running. You might also notice increased heat buildup on the live center body after a turning session. Perhaps the most visually obvious is a wobble when the workpiece is mounted and spinning, even at lower speeds. I recall a project where the vibration from a bad live center actually caused a crack to propagate through a perfectly good bowl blank before I could stop the lathe. That’s a clear signal to address the issue promptly.
Gathering Your Tools and Supplies
Before you dive in, assemble the necessary items. You’ll typically need a set of metric Allen wrenches or hex keys for disassembling the center body. A small flathead screwdriver can be useful for prying off retaining rings or seals. For cleaning, a good quality degreaser or brake cleaner works wonders, along with some lint-free rags or shop towels. Crucially, you’ll need appropriate high-temperature bearing grease – automotive wheel bearing grease is often a suitable choice, but check the manufacturer’s recommendations if possible. A small pick or a fine-tipped tool can help with removing old grease and seals. Some live centers might also have a snap ring that requires snap ring pliers, though many Oneway models use threaded components.
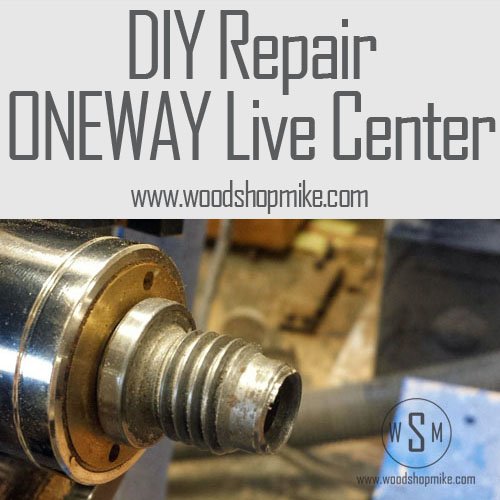
Step-by-Step: Disassembling Your Oneway Live Center
The process usually begins with removing the live center from your tailstock. Next, locate the set screw or screws that hold the shaft in place within the body. Loosen these with the appropriate Allen wrench. Carefully, and I mean *carefully*, try to unscrew the main body from the shaft. Sometimes this can be tight, requiring a gentle grip with a strap wrench or padded vise. Once separated, you’ll likely see the bearing(s) seated within the body. Depending on the model, you might need to gently pry out a retaining ring or simply press the bearings out. If it’s a sealed bearing, be cautious not to damage the seal or the bearing cage during removal. I once accidentally bent a bearing cage trying to force it, which meant I had to replace the entire bearing assembly instead of just cleaning it.
Inspecting the Bearings and Shaft
With the bearings exposed, this is your moment of truth. Inspect them closely for any signs of damage, pitting, or discoloration that might indicate overheating. Spin each bearing individually; they should rotate smoothly and quietly. If you feel any grittiness, hear grinding, or if they feel loose or wobbly, the bearings themselves may need replacement. Check the shaft where the bearings seated for any scoring or wear marks. Minor imperfections can sometimes be cleaned up, but significant damage means the shaft might be compromised. For many Oneway models, the bearings are standard sizes, often available from industrial supply stores, making replacement relatively easy if needed.
The Cleaning and Lubrication Process
This is arguably the most critical stage for restoring smooth operation. Thoroughly spray the bearings and the inside of the live center body with your degreaser. Use your rags and picks to remove all traces of old, dried-out grease and any accumulated metal filings or debris. It’s vital to get everything clean. After degreasing, ensure the parts are completely dry; compressed air is excellent for this. Then, carefully pack the bearings with your new high-temperature grease. Don’t be shy – you want them well-lubricated, but avoid overpacking to the point where it hinders rotation. Apply a thin film of grease to the shaft threads and anywhere metal-on-metal contact occurs during assembly. This fresh lubrication is like a revitalization shot for your live center.
Reassembly: Putting It All Back Together
Reassembly is essentially the reverse of disassembly. Gently press the greased bearings back into the body, ensuring they are seated correctly. If you removed a retaining ring or snap ring, reinstall it securely. Screw the shaft back into the body, tightening it firmly but without excessive force. Once the body is threaded onto the shaft, re-tighten the set screw(s) that secure the shaft’s position. Give the entire assembly a good spin by hand. It should feel significantly smoother than before. If you notice any binding, back off slightly and check for misalignment. A common mistake is overtightening the shaft, which can preload the bearings and cause premature failure. Aim for a smooth, free spin without any play.
Testing Your Newly Revitalized Live Center
Mount the repaired live center back onto your lathe. Attach a test piece of wood – something you don’t mind potentially damaging if things go awry, though with proper repair, this is unlikely. Start the lathe at a low speed and gradually increase it. Listen for any unusual noises and watch for vibrations. Spin the live center point with your fingers (carefully, of course) while the lathe is off; it should feel silky smooth. A successful repair will mean the live center spins effortlessly, with no roughness or wobble, supporting your workpiece reliably. I recently resurrected an older Oneway live center this way, and the difference was night and day. The piece I was working on finished flawlessly, without the annoying chatter I’d been experiencing.
When to Call It Quits (and Buy New)
While many live centers can be revived, there are definitive moments when throwing in the towel is the wiser course of action. If, after disassembly, you discover the shaft is bent, no amount of cleaning or greasing will fix the resulting wobble. Similarly, if the threads on either the shaft or the body are stripped or cross-threaded, the integrity of the connection is compromised, making it unsafe to use. If the internal races of the bearings are deeply pitted or the outer casing of the live center body is fractured, these are also clear indicators that replacement is the only sensible option. Safety must always be the priority; don’t risk a catastrophic failure for the sake of saving a few dollars on a tool that’s fundamentally damaged.
Advanced Tips and Tricks for Longevity
To extend the life of your Oneway live center, whether new or repaired, consider preventative maintenance. After dusty operations like sanding, it’s wise to give it a quick clean and re-lube. Avoid aggressive impacts; don’t use the live center to knock out bushings or other parts. Keep it protected from rust and corrosion, especially if you work in a humid environment. Some turners even fashion simple dust covers for their live centers when not in use. I’ve found that using a high-quality, water-resistant grease offers superior protection against contaminants. A little proactive care can significantly delay the need for major repairs or replacements.
The Future of Live Center Maintenance
Within the next five years, I anticipate we’ll see a greater emphasis on modular bearing systems within live centers, making routine maintenance even simpler. Manufacturers might offer specific, easy-to-access bearing replacement kits as standard. Furthermore, advancements in synthetic lubricants could lead to even longer service intervals and better protection against wear and tear. Expect to see more online resources and video guides focusing on specific models, demystifying the process for an even wider range of woodturners. The trend is leaning towards empowering users to maintain their tools, rather than simply replacing them.
Repairing your Oneway live center isn’t just a cost-saving measure; it’s a deeply satisfying DIY project that restores a vital piece of your woodworking arsenal. By understanding the mechanics and following a systematic approach, you can bring a seemingly dead tool back to life. This not only saves you money but also enhances your confidence and capability as a woodturner, allowing you to focus on the creative process rather than worrying about equipment failures.