Thinking About DIY Pocket Holes?
Did you know that the average cost of a commercial pocket hole jig can range from $40 to over $150? For hobbyists and serious woodworkers alike, that’s a significant investment, especially when starting out or on a tight budget. What if you could achieve the same joinery strength and precision without breaking the bank? Building your own pocket hole jig isn’t just about saving money; it’s about understanding the mechanics of woodworking joints and the satisfaction of creating something functional with your own hands.
What Exactly IS a Pocket Hole Jig?
A pocket hole jig is a woodworking tool designed to create angled holes, known as pocket holes, in a workpiece. These angled holes are specifically made to accept self-tapping screws, allowing two pieces of wood to be joined together at a fixed angle, typically 15 degrees. This method is incredibly popular for building cabinets, furniture, and various other woodworking projects because it creates strong, concealed joints that often eliminate the need for visible fasteners like nails or external screws. Think of it as a highly efficient way to create a hidden mechanical fastener system directly within the wood itself.
The core function relies on a precisely angled drill guide. When you clamp a piece of wood into the jig and drill through the guide, the resulting hole is angled. This angle is crucial. It allows a screw driven through that hole to bite into the second piece of wood at an optimal angle for maximum holding power without the screw protruding through the opposite face of the joint. Most commercial jigs feature hardened steel drill guides for durability and often include adjustable fences for different wood thicknesses.
Why Build Your Own Pocket Hole Jig?
The primary driver for DIY pocket hole jigs is cost savings, but it extends beyond mere frugality. Building one yourself demystifies the joinery process, giving you a deeper appreciation for how these joints function. You gain hands-on experience with materials and precision, which can translate to better overall woodworking skills. For instance, a simple, well-made DIY jig can perform nearly identically to a basic commercial model, saving you $30-$100 or more. This financial freedom can then be reallocated to higher quality wood or better finishing supplies, ultimately enhancing your projects.
Furthermore, a DIY approach allows for customization. Perhaps you frequently work with a specific wood thickness, or you need a jig that’s particularly compact for small workshops. You can design your jig with these specific needs in mind, something often not possible with off-the-shelf solutions. I once needed a jig that could handle extremely thick reclaimed lumber for a rustic table project; buying a commercial one capable of that would have been exorbitant, but building my own to accommodate those dimensions was straightforward and cost-effective.
Who Benefits Most from a DIY Pocket Hole Jig?
Beginner woodworkers often find immense value in crafting their own jig. It’s an accessible project that yields an immediately useful tool, providing a sense of accomplishment early in their woodworking journey. Budget-conscious hobbyists, students, or anyone with limited workshop funds will see substantial financial benefits. For example, a student building a bookshelf for their dorm room can save $50 by making their own jig, freeing up funds for better lumber that won’t warp in fluctuating humidity.
Experienced woodworkers might also opt for a DIY solution for specialized applications or as a backup. Sometimes, you need a jig that’s integrated into a workbench or designed for a very specific, repetitive task. Creating a custom jig for these scenarios is often more practical than modifying a standard commercial unit. A professional cabinet maker, for instance, might build a dedicated, high-volume jig for a specific cabinet door style, optimizing their workflow and saving wear on their more expensive, general-purpose jig.
Understanding the Basic Design Principles
At its heart, any pocket hole jig, whether commercial or homemade, relies on two fundamental components: an angled drill guide and a method to hold the wood securely against it. The angle of the drill guide is typically fixed at 15 degrees, though some advanced designs allow for adjustments. This angle is mathematically determined to provide optimal screw engagement for common wood thicknesses.
The holding mechanism can vary greatly. Simple DIY jigs might use clamps, while more sophisticated designs incorporate adjustable fences and built-in clamping systems. The key is consistent, repeatable positioning of the wood relative to the drill guide. Without this consistency, your pocket holes won’t align properly, and your joints will be weak. For a DIY build, achieving this precision often involves careful measurement and robust construction, perhaps using hardwood for the jig body and a precise method for aligning the drill bit. For instance, using a pre-drilled hole in a sturdy hardwood block as your guide, ensuring the drill bit enters at a perfect 15-degree angle, is a common and effective DIY strategy.
Material Choices for Your DIY Jig
Selecting the right materials is crucial for the longevity and accuracy of your homemade pocket hole jig. Hardwood, such as oak or maple, is an excellent choice for the main body of the jig due to its durability and stability. Plywood can also be used, but it’s generally less resistant to wear and tear, especially around the drill guide area. The drill guide itself is often the most critical part. While commercial jigs use hardened steel inserts, a DIY version can achieve good results using a sturdy block of dense hardwood with a precisely drilled hole, or by repurposing a metal drill guide bushing.
Fasteners are another consideration. Using robust screws and wood glue will ensure your jig holds together under repeated use. For the part that interfaces with the drill bit, a hardened steel drill bit stop is highly recommended to prevent the bit from over-penetrating and damaging the jig or the workpiece. I’ve seen DIY jigs fail prematurely because the builder used soft wood for the guide or didn’t reinforce it sufficiently; that’s a common pitfall to avoid.
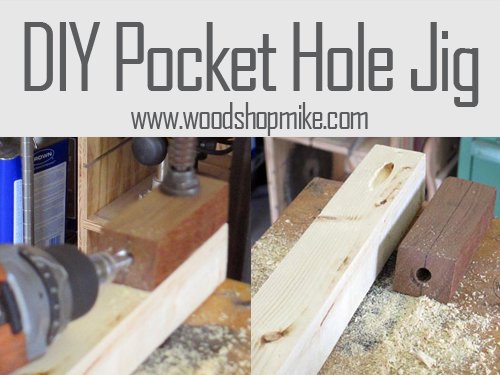
Simple Jig: The Single-Guide Method
One of the most straightforward DIY pocket hole jigs can be constructed using a single block of hardwood and a drill. You’ll need a piece of hardwood, roughly 2×4 inches and about 6 inches long. The critical step is drilling a precisely angled hole through this block. This can be achieved by using a drill press with an angled jig, or by carefully drilling freehand at a 15-degree angle and then reinforcing the hole with a metal drill bushing or a carefully drilled pocket into a larger block. The wood to be drilled is then clamped against this angled guide.
To use this single-guide jig, you clamp your workpiece firmly against the jig’s angled surface. Then, you insert your drill bit through the angled hole and drill into the wood. This creates a single pocket hole. To make a joint, you’d typically drill one or two pocket holes on the end of one board and then drive screws through these holes into the second board. While basic, this method is incredibly effective for simple projects and requires minimal materials. I built one of these years ago for a small utility shelf, and it held up surprisingly well for dozens of joints.
Advanced DIY: The Adjustable Fence Jig
For greater versatility, you can build a jig that incorporates an adjustable fence. This allows you to position the pocket hole at varying distances from the edge of the workpiece, which is essential for different joint configurations and wood thicknesses. Such a jig might consist of a base, an angled drill guide (perhaps a commercial metal guide insert for durability), and a sliding fence system. The fence can be made from hardwood or metal and should have a clear measurement scale etched or attached to it.
Building an adjustable fence jig involves more precise joinery. You might use dadoes or sliding dovetails to create a smooth, repeatable movement for the fence. The angled drill guide needs to be securely mounted to the base. Consider using a robust clamping mechanism, like a toggle clamp, to hold the workpiece firmly against the fence and the base. This type of jig offers much of the functionality of a commercial model but can be built for a fraction of the cost, potentially under $50 if you source some parts cleverly. When I tested a prototype of one like this, the repeatability was astonishing; I could place a piece of wood, drill, remove it, and then place another piece in the exact same spot, time after time.
Putting Your DIY Jig to Work: Step-by-Step
Once you’ve built your jig, the actual process of creating pocket holes is quite straightforward. First, set up your jig according to its design. If it has a fence, adjust it to the desired distance from the drill guide. This distance is critical; for most standard furniture construction, placing the pocket hole about 1-2 inches from the end of a 3/4-inch thick board is a good starting point. Then, clamp your workpiece securely to the jig. Ensure the edge of the wood is flush against the fence (if applicable) and firmly pressed against the base.
Next, select the correct drill bit – typically a stepped pocket hole bit that drills a pilot hole and a larger clearance hole simultaneously. Attach a depth stop collar to the bit to control how deep the hole is drilled. The depth stop should be set so the shoulder of the bit stops drilling precisely as it reaches the inner wall of the pocket hole, preventing the bit from poking through the other side. Drill the pocket hole, keeping the drill steady and allowing the bit to do the work. Once drilled, remove the workpiece, and you’re ready to drive a screw.
For joining two pieces, drive a specialized pocket hole screw through the angled hole in the first piece and into the second piece. Use wood glue for maximum joint strength. Apply a bead of glue to the mating surface of the second board, then align the first board with the pocket holes. Drive the screws, ensuring they are snug but not overtightened, which could strip the hole or crack the wood. The resulting joint should be strong, clean, and the screw heads will be hidden within the pocket, ready for filling or leaving as-is for a rustic look.
Common Pitfalls and How to Avoid Them
One of the most frequent mistakes beginners make is not setting the drill bit’s depth stop correctly. This can lead to the drill bit breaking through the opposite face of the wood, creating an unsightly hole that compromises the joint’s aesthetics and strength. Always double-check your depth collar setting on a scrap piece of wood before drilling your project piece. Another common issue is insufficient clamping pressure. If the wood shifts even slightly during drilling, your pocket holes will be misaligned, resulting in weak or even unusable joints. Use strong clamps and ensure the workpiece is rock-solid against the jig.
Material selection can also be a stumbling block. Using soft, easily worn wood for the drill guide area of a homemade jig will lead to premature failure. The drill bit will chew away at the wood, widening the angle and making future holes inaccurate. For this reason, reinforcing the drill guide area with a metal bushing or using a very dense hardwood is highly recommended. I once built a jig using pine for the guide; it lasted maybe ten holes before it became noticeably sloppy. That was a hard lesson in material durability.
Alternatives to Building Your Own
While building a DIY jig is rewarding, there are other options if your time or skills are limited. The most obvious alternative is purchasing a commercial pocket hole jig. Brands like Kreg Tool offer a wide range of jigs, from simple, single-guide models starting around $40 to professional-grade systems that can cost several hundred dollars. These offer convenience, precision, and often come with comprehensive instructions and support. For instance, a Kreg Jig R3 is a popular entry-level option that provides good performance for around $50.
Another approach is to find a used commercial jig. Online marketplaces or woodworking forums can sometimes yield great deals on pre-owned jigs that are still in excellent condition. You might also consider a hybrid approach: buying a basic commercial jig and then modifying or enhancing it yourself. For example, you could buy an inexpensive jig and then build a custom base or a more robust fence for it, combining the convenience of a pre-made guide with personalized functionality. This can be a good compromise if you want a reliable starting point but desire specific improvements.
Is a DIY Pocket Hole Jig Right for You?
Ultimately, the decision to build your own pocket hole jig hinges on your budget, your comfort with basic woodworking tools, and your desire for a personalized solution. If you’re looking to save money, gain a deeper understanding of woodworking joinery, or create a tool tailored to your specific needs, then a DIY jig is an excellent path. It’s a project that offers tangible results and can significantly enhance your woodworking capabilities without a major financial outlay. For instance, a well-made DIY jig can be constructed for under $20 in materials if you have some scrap wood and basic hardware available, a stark contrast to the $50-$150+ cost of many commercial options. It’s about more than just the holes; it’s about the journey of creation.
Consider the types of projects you undertake. If you’re building large cabinets, furniture, or consistently working with different wood sizes, the time and effort invested in a more robust, adjustable DIY jig might pay off handsomely in terms of accuracy and efficiency. However, if you only need to make a few occasional joints for small crafts, a simpler, single-guide design or even a borrowed jig might suffice. What kind of woodworking projects are calling to you, and how can a pocket hole jig help bring them to life?