Why Are You Even Thinking About Removing Carpet?
Did you know that the average home carpet can harbor over 200,000 bacteria per square inch? That’s more than a toilet seat! If the thought of that microscopic ecosystem lurking beneath your feet makes you squirm, you’re not alone. Many homeowners decide to ditch their carpets for reasons ranging from allergies and hygiene to a desire for a more modern aesthetic or even to uncover beautiful hardwood floors. The decision to remove carpet isn’t just about aesthetics; it’s often a practical step towards a healthier and more versatile living space. For some, it’s a necessity driven by pet accidents or significant spills that have permanently stained the fibers. Others might be undertaking a renovation and find that the existing carpet simply doesn’t align with their new design vision.
Understanding the ‚What‘: What Exactly Are You Removing?
Removing carpet involves more than just yanking up the fabric. You’re dealing with several layers: the carpet itself, padding underneath, and often a tack strip system around the perimeter of the room. Sometimes, there’s also adhesive used to secure the carpet or padding, especially in high-traffic areas or commercial settings. The type of carpet also plays a role. Is it wall-to-wall carpeting, or are you removing area rugs that are simply placed on top of another flooring? Wall-to-wall carpet is usually stretched and secured to the floor with tack strips, requiring more effort to dislodge. Area rugs, on the other hand, are a simple matter of lifting and rolling. This distinction is crucial for planning your approach and gathering the right tools. Identifying the type of installation—glued down versus tack strip—will dictate your removal strategy. For instance, glued-down carpet often requires a powerful scraper and a lot of elbow grease.
The ‚Why‘: Allergies, Aesthetics, and Underlying Treasures
The primary drivers for carpet removal often boil down to health, appearance, and the potential for a more desirable subfloor. For individuals suffering from allergies or asthma, carpets act as massive dust and allergen traps. They can hold onto pet dander, dust mites, and mold spores, constantly reintroducing them into the air. Removing carpet can significantly improve indoor air quality, offering a breath of fresh air, literally. Beyond health, aesthetics play a huge role. Many find that exposed hardwood floors, tile, or polished concrete offer a cleaner, more sophisticated look than dated or worn carpeting. I’ve seen countless homes transformed by uncovering beautiful, original hardwood floors that were hidden for decades; it’s like finding a hidden gem. The cost savings from not buying new flooring can also be substantial if the subfloor is in good condition. A statistic from the Asthma and Allergy Foundation of America suggests that millions of Americans suffer from dust mite allergies, and carpets are a primary culprit in housing these microscopic pests. This alone makes carpet removal a compelling option for improving home health.
DIY vs. Professional Removal: Weighing Your Options
Deciding whether to tackle carpet removal yourself or hire professionals depends on several factors: your available time, physical ability, the size of the area, and your budget. DIY removal can save significant labor costs, but it’s labor-intensive. A typical 12×15 foot room can take anywhere from 2 to 6 hours for an experienced DIYer, and potentially much longer for a first-timer, especially if the carpet is glued down. Professionals, on the other hand, can often complete the job much faster, typically within a couple of hours per room, and they have the specialized equipment to handle stubborn adhesives or difficult-to-remove padding. However, their services come at a price, often ranging from $0.50 to $2.00 per square foot, depending on location and complexity. When I personally removed the carpet from my old den, I underestimated how difficult it would be to pull up the carpet and padding that had been glued down. What I thought would be a Saturday afternoon job turned into a full weekend of scraping and sweating. Hiring professionals would have been more expensive, but certainly less back-breaking.
The ‚How‘: A Step-by-Step Guide to Carpet Removal
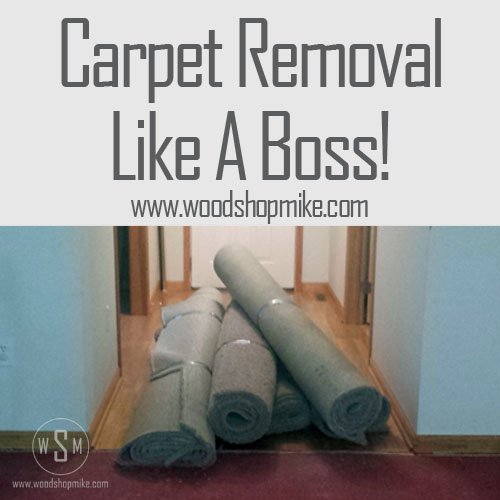
The process of removing carpet generally follows a predictable sequence, though variations exist based on installation methods. First, you’ll want to gather your tools: a utility knife with plenty of sharp blades, a pry bar, pliers (needle-nose work well), a heavy-duty scraper, work gloves, safety glasses, a dust mask, and heavy-duty trash bags or a dumpster. For larger jobs, a carpet knee kicker and power stretcher might be useful for removing the carpet from tack strips more easily, though these are often rented. You’ll need to start by removing furniture and any items from the room. Then, using your utility knife, cut the carpet into manageable strips, roughly 3-4 feet wide. Start at a corner and pull the carpet back from the tack strips. Once the carpet is in strips, you can roll them up. Next comes the padding, which is usually just laid underneath the carpet and can be pulled up or cut and rolled. Finally, the tack strips need to be carefully pried up using the pry bar. Be mindful of the sharp nails. After all materials are removed, you’ll need to scrape away any remaining adhesive or backing. This thorough approach ensures a clean slate for your next flooring project.
Dealing with Stubborn Adhesives and Padding
One of the most challenging aspects of carpet removal is dealing with strong adhesives, especially those used in high-traffic areas or commercial installations. These glues can be incredibly tenacious, making it difficult to fully remove them. In some cases, heat guns can help soften the adhesive, making it easier to scrape away. Specialized adhesive removers are also available, but always test them in an inconspicuous area first to ensure they don’t damage the subfloor. The padding can also present its own set of issues. If it’s thin, it usually comes up easily. However, thicker, glued-down padding can be a real workout. Using a floor scraper with a long handle is often the most effective method. Sometimes, if the padding is particularly difficult or the adhesive is extremely stubborn, it might be more practical to cover it with a thin layer of self-leveling compound rather than attempting complete removal, provided the subfloor is suitable for such a treatment. I once encountered a situation where the adhesive was so strong, it had bonded the carpet backing directly to the concrete subfloor. We ended up having to use a floor grinder to remove it, which was a messy but effective solution.
The ‚When‘: Timing Your Carpet Removal Project
The best time to remove carpet often aligns with periods of lower household activity or when you’re already planning other renovations. Spring and summer are popular due to better weather conditions, which can be helpful if you need to air out the room extensively or if disposal involves temporary outdoor storage. If you have pets or young children, consider performing the removal while they are staying elsewhere, as the process can be dusty and disruptive. Some homeowners opt to remove carpet just before installing new flooring; this is logical but requires careful coordination to avoid prolonged exposure of the bare subfloor. A common scenario is tackling it during a longer holiday break or a vacation, allowing the room to ‚breathe‘ and for any lingering odors to dissipate. A colleague once told me they removed their carpet right before a big family gathering, thinking it would be a quick job. They ended up having to live with a bare subfloor for two weeks longer than anticipated, much to their guests‘ bemusement.
Disposal: What Do You Do With All That Old Carpet?
Disposing of old carpet and padding can be surprisingly tricky. Many landfills no longer accept carpet due to its bulk and the synthetic materials it contains. Carpet recycling programs exist in some areas, but they often require the carpet to be clean and free of padding and tack strips, which adds to the preparation effort. Your best bet is usually to check with your local waste management authority for specific guidelines. You might need to rent a dumpster for larger quantities, or you could arrange for a special bulk pickup. Some carpet installers offer removal and disposal services as part of their package when you purchase new flooring, which can simplify the process immensely. If you’re doing it yourself and have a significant amount, consider contacting a local junk removal service; they can often haul it away for a fee. A common mistake is assuming you can just bag it up and put it on the curb; this rarely works and can result in fines.
The ‚Who For‘: Who Benefits Most from Carpet Removal?
Carpet removal is a significant benefit for individuals and families dealing with allergies, asthma, or other respiratory sensitivities. The reduction in trapped allergens can lead to noticeably improved air quality and fewer allergy-related symptoms. It’s also a fantastic option for pet owners who are tired of dealing with stains, odors, and embedded pet hair that traditional vacuuming can’t fully address. Homeowners looking to update their home’s aesthetic and increase its perceived value often find carpet removal a cost-effective way to achieve a more modern and sophisticated look, especially if uncovering hardwood is an option. Renovators and DIY enthusiasts who enjoy hands-on projects will find the process rewarding, albeit challenging. Furthermore, if you’re planning to install a different type of flooring like tile, laminate, or hardwood, removing the carpet is the necessary first step. The ‚wow‘ factor of revealing beautiful, original hardwood floors is a scenario that appeals to many seeking to add character and value to their homes.
Uncovering Hidden Potential: The Subfloor Revelation
What many people don’t anticipate is the potential hidden beneath the carpet. In older homes, particularly, you might uncover original hardwood floors that are in surprisingly good condition, just needing a good sanding and refinishing. This can be a massive cost saver and adds significant character and value to your home. Even concrete subfloors can be transformed into stylish polished concrete or a base for epoxy coatings. However, it’s not always a fairy tale. Subfloors can have damage, unevenness, or moisture issues that need addressing before new flooring can be installed. I’ve seen situations where homeowners were thrilled to find hardwood, only to discover significant water damage beneath a poorly sealed window that had rotted a large section. This meant a much bigger repair job than initially planned. Always inspect your subfloor thoroughly after carpet removal.
Preparation is Key: Ensuring a Smooth Removal Process
Before you even pick up a utility knife, proper preparation is crucial for a smoother, faster removal. Clear the room completely. Remove all furniture, decorations, and anything else that isn’t nailed down. Take down curtains or blinds if they might get in the way. Protect adjacent flooring or doorways with painter’s tape and plastic sheeting if you’re concerned about dust or damage spreading. Ensure you have all your tools readily accessible. For glued-down carpet, consider renting a carpet puller or a floor steamer; these can make a significant difference in the effort required. Ventilation is also key; open windows to allow for airflow, especially if you’re using any chemicals for adhesive removal. A well-prepared space reduces stress and makes the actual removal process far less daunting. When I prepped my last room, I spent an hour just clearing out a walkway and organizing my tools. It saved me so much time and frustration later.
Post-Removal Cleanup and Subfloor Preparation
Once the carpet, padding, and tack strips are out, the real work of preparing the subfloor begins. This involves thorough cleaning to remove all debris, dust, and any remaining adhesive residue. A shop vacuum is indispensable for this stage. If there are any high spots or nails sticking up, they need to be hammered down or removed. If the subfloor is uneven, you might need to use a floor filler or a self-leveling compound, depending on the material (wood or concrete) and the degree of unevenness. For wood subfloors, check for any squeaks or loose boards and secure them. For concrete, ensure it’s clean, dry, and free of cracks before proceeding with new flooring. Moisture testing is also critical, particularly for concrete, to prevent issues with new flooring down the line. A clean, level, and dry subfloor is the foundation for a successful new flooring installation; skipping these steps often leads to problems later.
So, as you consider pulling up that old carpet, think about the underlying potential and the health benefits. Are you ready to embrace a cleaner, potentially more beautiful, living space?